Creating a signature/logo
1. Go the "Messages" tab and select in the menu "Signatures" or "logos"
2. Click on "Add new". A message window will open.
3. Create the signature/logo that you want. You can insert text, images or both.
Note: To add an image click on the image icon in the tool bar. See the guide
to "Adding an image to a message".
It is recommended to first enter the text and then position the cursor where you want to add the image.
4. Give the signature/logo an inner name – the name is for your use only and will not be displayed in the message body.
5. Click on "Save"
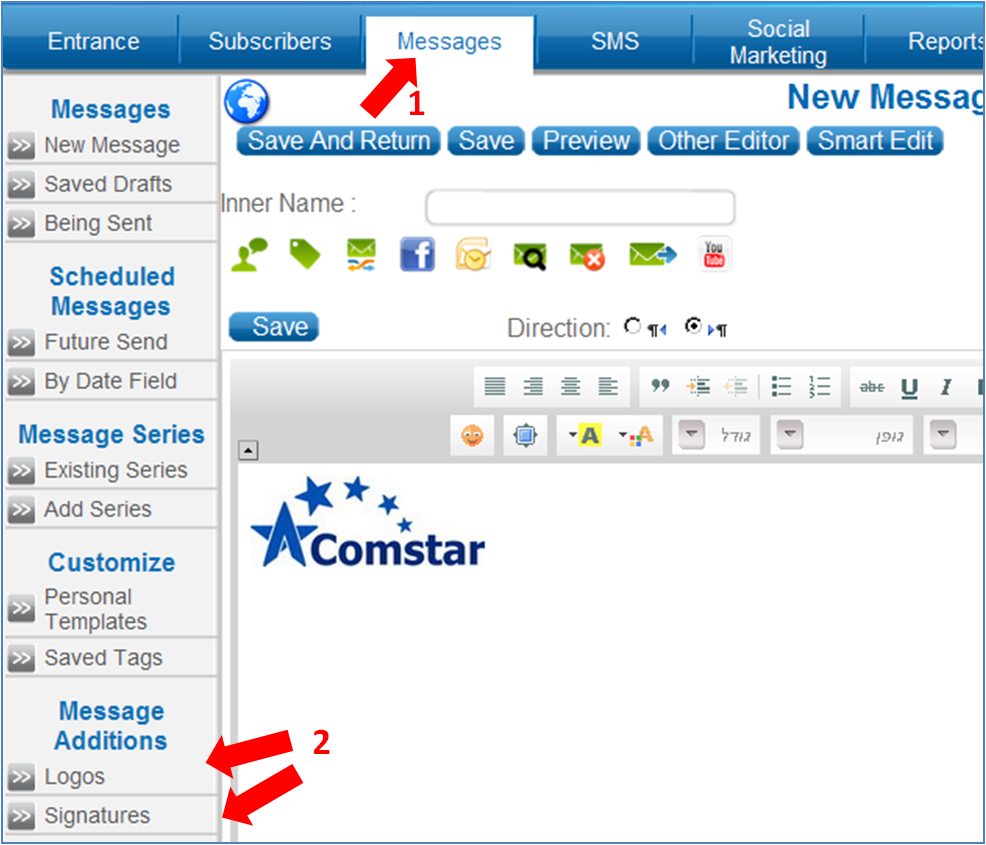
6. To view the signature/logo that you have created you can click on "Preview" at the top of the page.
Using a signature/logo
1. Once you have created the message, position the cursor in the location you want to place the signature/logo.
Note: Remember that you cannot place a signature/logo next to text except when creating a table.
See the guide to "Creating a table in the editor".
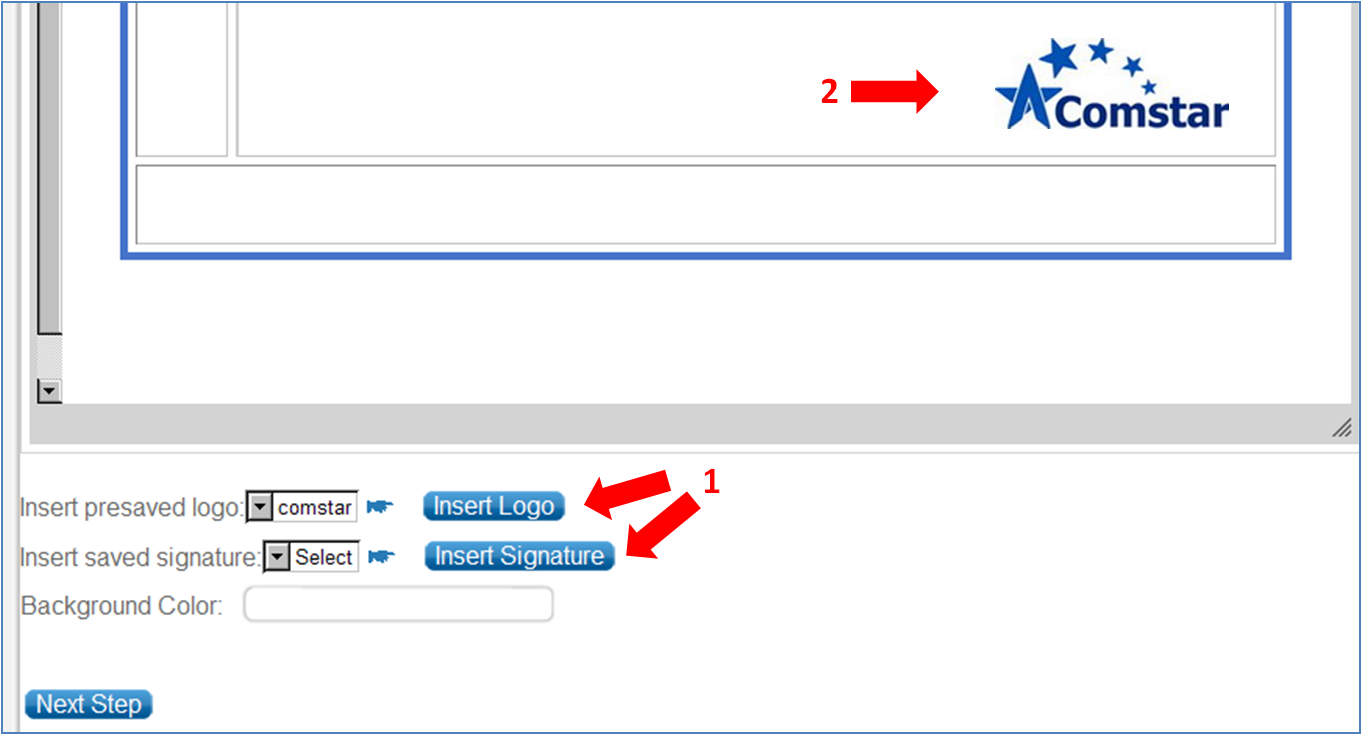
2. Under the message editor select the signature/logo that you want to insert and click on "Insert signature" or "Insert logo".
|