Saved Tag
A saved tag is actually an interchangeable message. It can be used as a newsletter corner (such as "What's new) or special offers that can be updated periodically.
With the use of a saved tag you can schedule a message or a series of messages and change the newsletter corner or interchangeable corner in the saved tag without having to change the entire message.
There a several steps in creating a saved tag:
1. Create a saved tag
2. Using a saved tag in a message
3. Changing the tag content
Creating a saved tag
1. In the "Messages" tab select "Saved tags" in the menu.
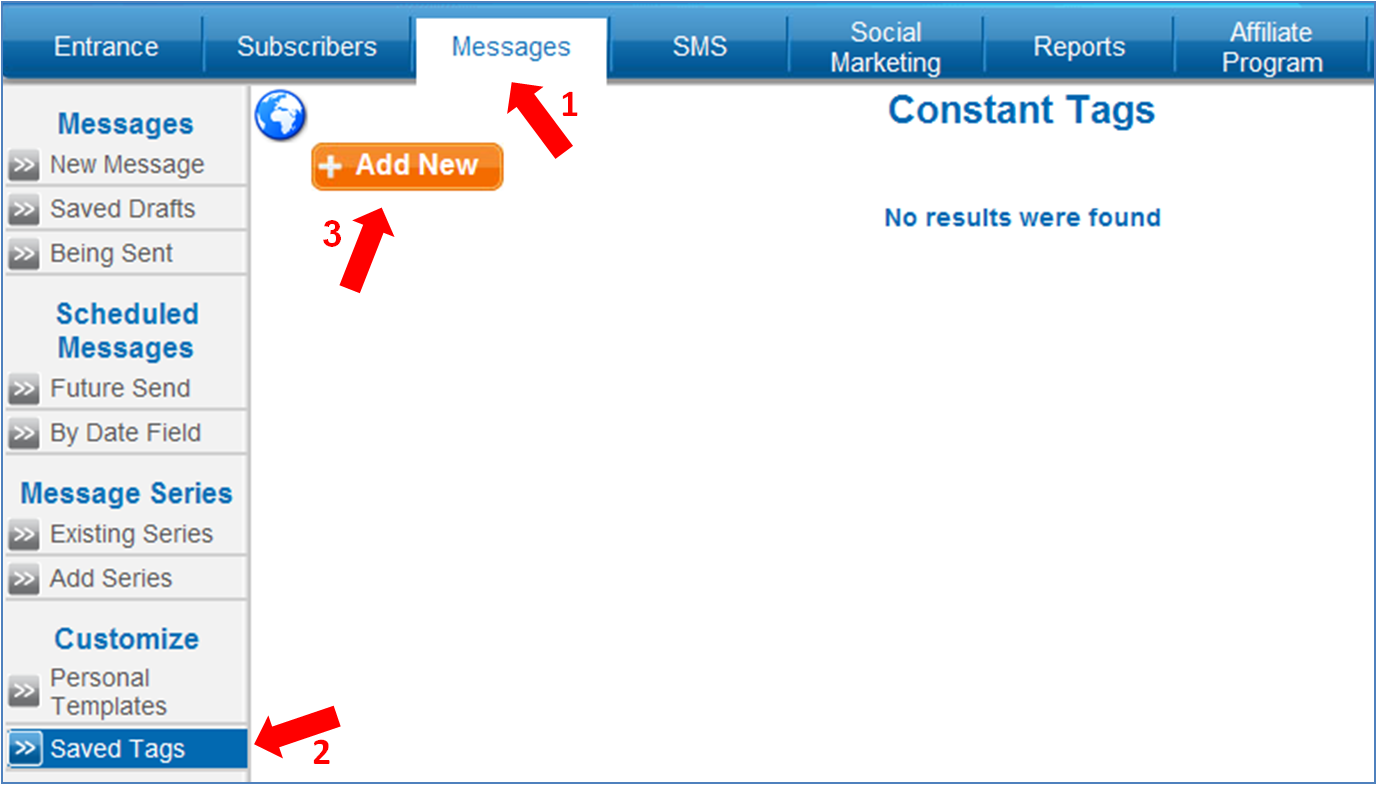
2. Click on "Add new". An edit box will open.
3. Give the tag a name (e.g. Special offers). The tag name should categorize what is in the tag and should not be specific or temporary information that may change (such as special 50% discount). The name is for your use only and will not be visible to the recipients.
Recommended! Make sure to choose a short name without quotation marks, slashes or multiple indications.
4. Create the tag content and design. The content should match the design of the messages the tags will appear in or maintain a neutral design.
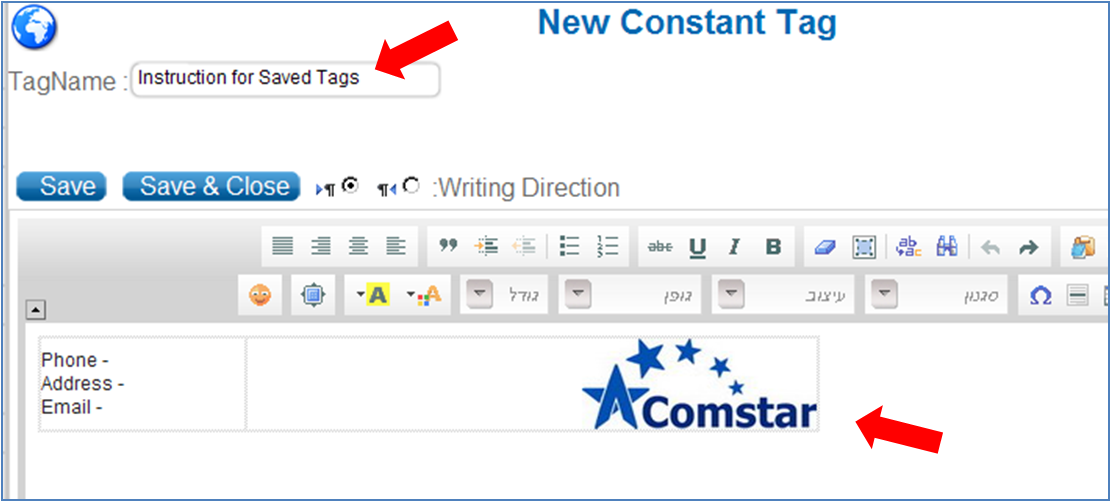
5. Click on "Save" or "Save & close".
Using a saved tag in a message
1. Go to "New message" and select a template or select a message from "Saved drafts".
2. Position the cursor in the message body where you want to place the contents of the tag.
3. Click on "Add Constant tag" in the advanced options in the tool bar
4. Select the desired tag and click on "Insert To Body"
.
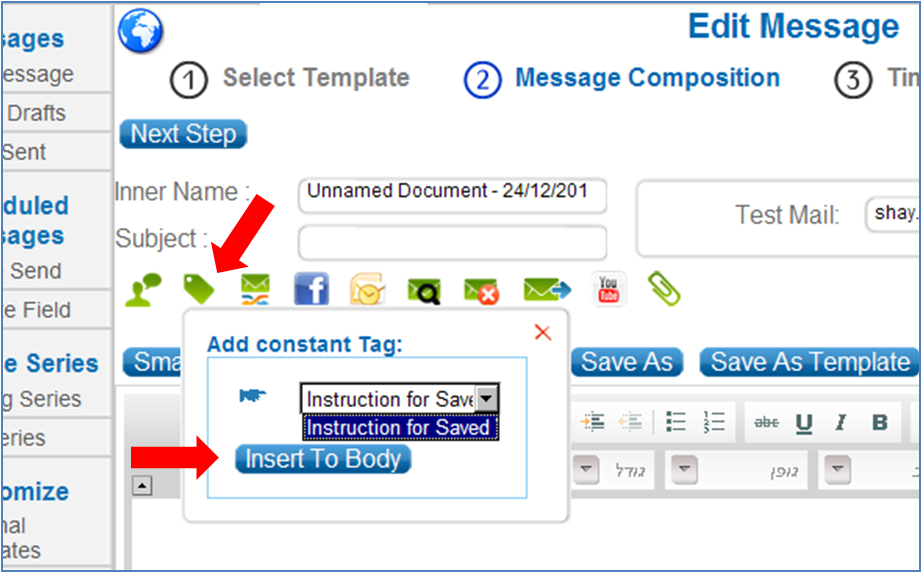
5. Please note – In the message body only the tag name will appear with square brackets. In order to view the message as it will appear once sent, click on 'Next Step" and send yourself a test message. You can return to edit the message by clicking on "Return to edit message".
Changing the tag content
1. Go to the "Messages" tab and select " Saved tags"
2. Select the desired tag and click on "Edit"
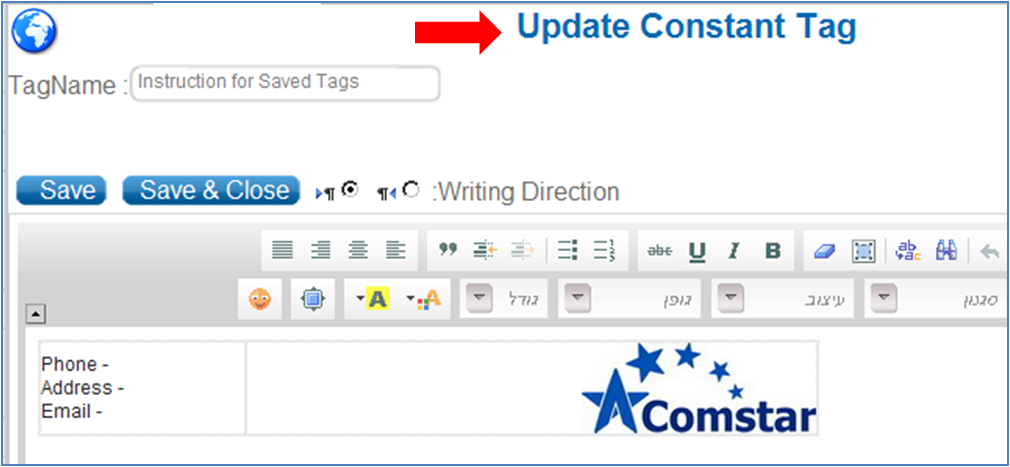
3. Edit the contents of the tag.
4. Save the new content by clicking "Save" or "Save & close".
|