|
|
Importing members from an Excel file
Arranging the Excel file before importing to the system:
1. Usually, after exporting email addresses the result is a file that contains information, some of which is not essential.
It is required to arrange the file in such a way that the content in the columns correlate with the member fields you set in the system. If the file contains further subjects that you did not set fields for in the system it is important to add these fields to the system before importing from the file.
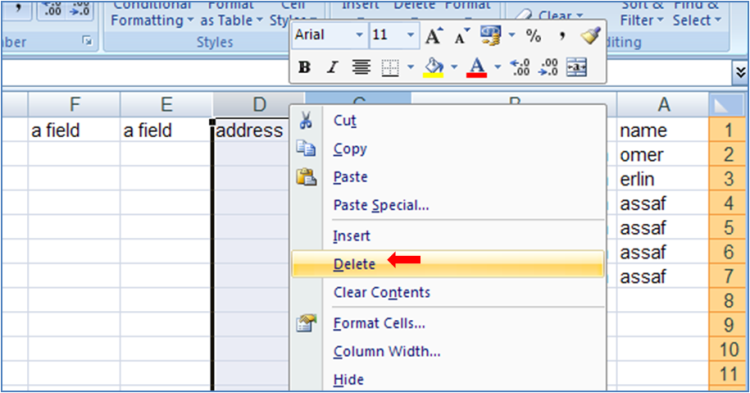
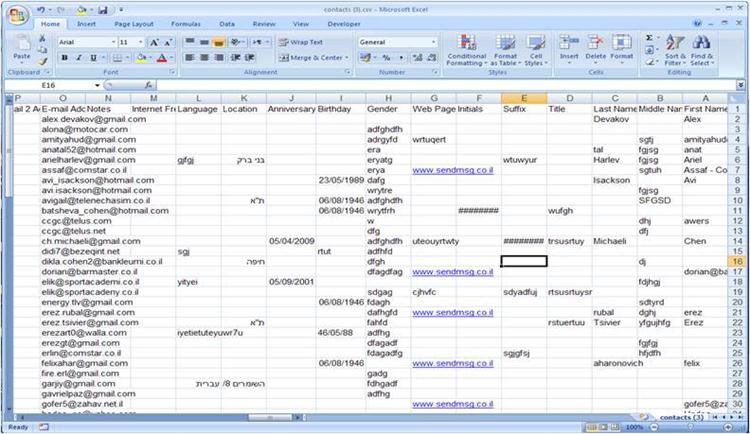 2. Delete the columns that are unnecessary by choosing the entire column (click on the column letter), right click on mouse and choose "delete".
Attention – one column must contain email addresses and must not be deleted.
 3. If there are any unnecessary lines, delete them as well.
Attention – This first line in the file must not be deleted – this line is the title line of the file.
4. In order to import to a "multiple choice" field or "yes/no" field, it is necessary to ensure that the column only contains the exact options you set in the system, in each cell one option which is identical to the options set in the system.
5. It is recommended that the data table you wish to import to the system is found in the first worksheet of the file (at the bottom of the file, "sheet 1").
The file types that can be imported are "xlsx", "xls" or "csv".
Once you have arranged the file move on to importing the file to the system.
Importing member file to the system:
1. Once you have finished arranging the file go to the "subscribers" tab in the system.
In the menu on the left hand side under the title "Add subscribers" choose "Excel Import" and in the window that will open click on "upload file".
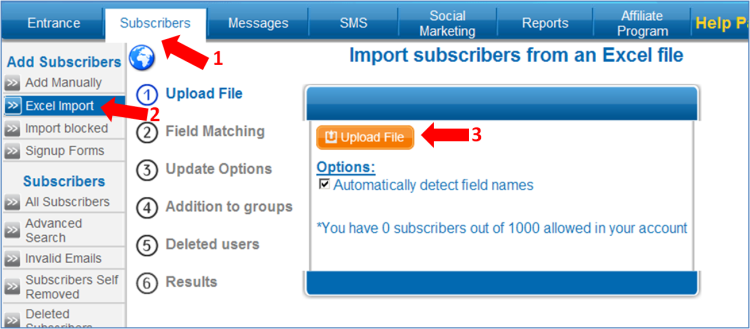
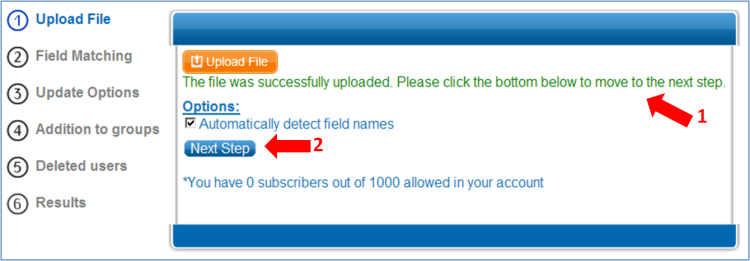
2. Upload File: Choose the desired file which has been saved on the computer and click "next'.
3. Field Matching: At this point you must correlate between the fields you set in the system and the titles in the Excel file.
It is required to choose the correlation of the field "email address"
Note that - the titles appearing in blue are the titles from the Excel file and they will not be shown in the system. The options that appear in the select menu are the fields that were set in the system.
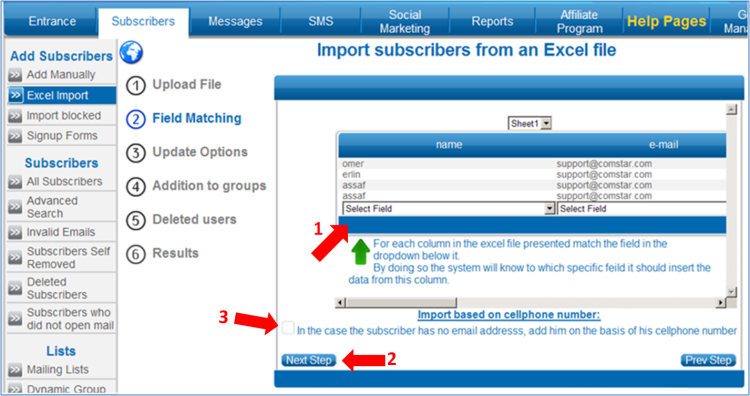
***Should you wish to add a field that you have not yet set in the system, go to the "enter" tab and in the menu on the left hand side under the title "tools" choose "field settings". You will then have to upload the file once again (repeat sections 1-3).
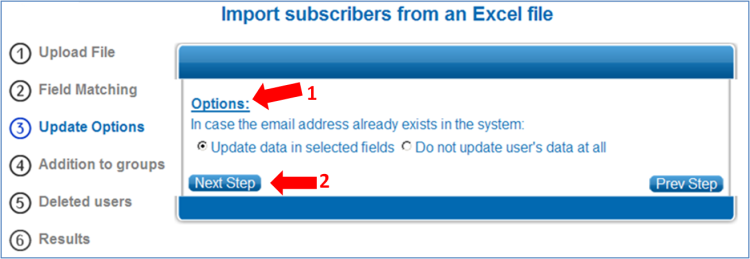
4. Update Options: you can choose to add the new subscribers and update already exists data or you can choose only to add the new subscribers.
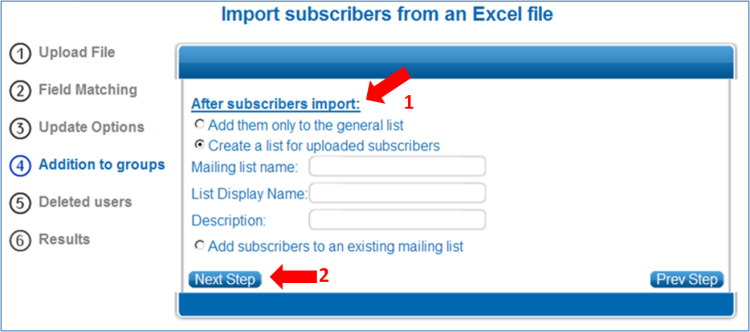
5. Addition to groups: after you imported the recipients you now have to choose to which list do you want them to be imported to.
Attention – in th end of the process all the subscribers will be imported to the general list of recipients in addition to the list you chose.
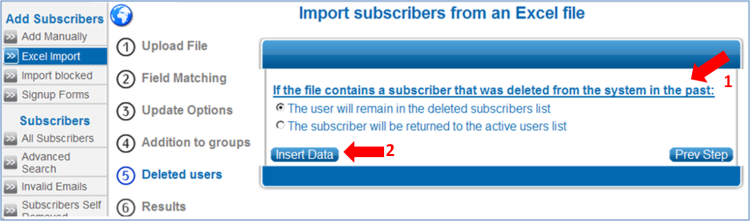
 6. Deleted users: If the file contains subscribers that was deleted from the system in the past you can choose thet they will return to be an active user or thet they will stay deleted and after you chose the desired option, press on "Insert Dete".
 7. Results: You will be required to wait for several seconds up to several minutes. During this time the addresses from the file are being checked and the system will filter out duplicates in addresses. The system will accept only correct addresses in the following structure: aaa@bbb.ccc.
Once the process is complete you will receive a summary message.
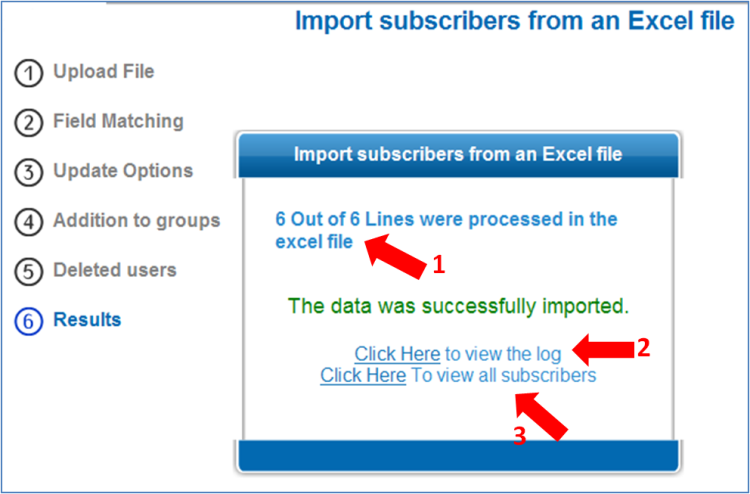
Tip – The documentation report can greatly assist in solving problems importing the members from the Excel file.
|
|
|
|
|
|
|
|
|
|
|
|
This page is presented using Sendmsg - A newsletter distribution system.
|
|