Creating a new message
Click on the "messages" tab in the menu on the left hand side and choose "new message".
1. Choosing a template
2. Writing/editing message
3. Timing and recipients
4. Sending message
Choosing a template
1. A template can be chosen for a message. You can choose from:
- ● "Designed templates" – they can be edited
- ● "Saved drafts" – drafts you have previously worked on
- ● "Personal templates" that you have created
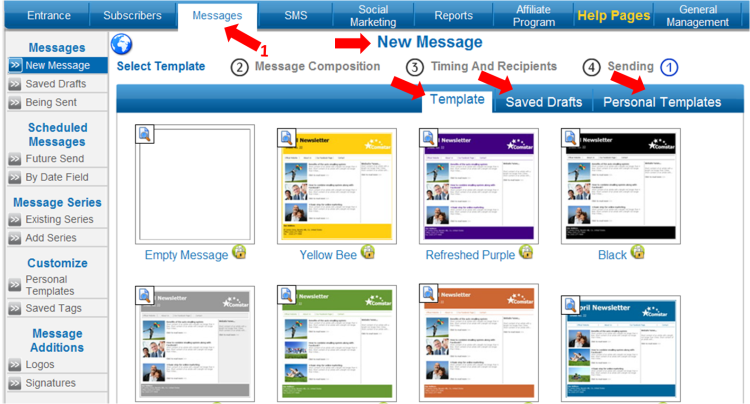
2. Click on the template of your choice.
You can choose between smart editing (the lock icon) and regular editing.
For more information on smart editing go to the "smart editor uses" manual.
To choose regular editing click on the template image.
Writing/editing messages
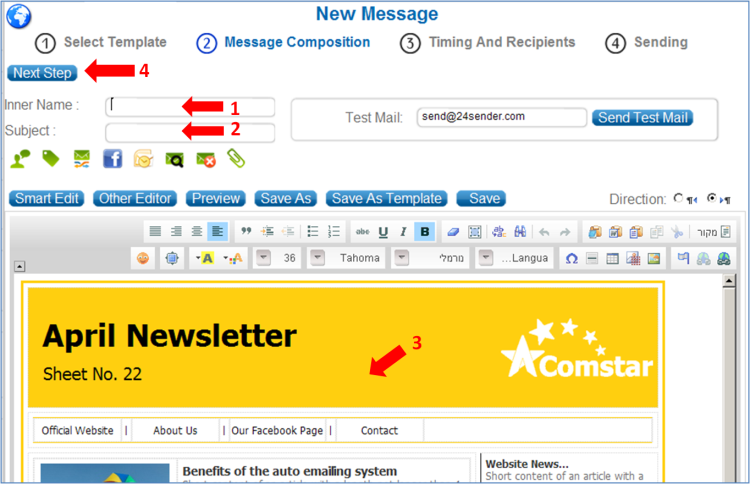
1. Enter an "Inner name" (intended for identification within the system and will not be shown elsewhere).
2. Enter a "Subject" (it will be seen by recipients when the message reaches their inboxes).
3. In the template body add/edit the message content.
- ●At the bottom of the editor you can add a signature/logo that you created in advance and choose a background color for the message.
- ●When clicking on "advanced options" you can add personal greetings, saved tags, forwarding between groups link and a share on Facebook button.
- ●Personal greetings allow the addition of information existing on the member to the message itself (such as first name or date of last meeting). In order to do this, place the cursor on the desired place in the message body, choose the desired field from the selection menu and click on "place in body of text".
- ●Important note!
When copying content from a word file/another site, design settings that are not compatible with Html are saved and may cause difficulties editing. After pasting the content, mark the content and click on the "remove design" button in the tools bar (situated at the top part of the bar, in the shape of an eraser). Now define the design using the editor.
4. Click on the "next" button. (The system saves the message when the "next" button is clicked)
Timing and recipients
1. Send yourself a test mail – enter an email that the message content you have created will be sent to and send an example.
 Attention -
links to unsubscribe will be added to the actual message and do not appear in the test message.
Attention -
links to unsubscribe will be added to the actual message and do not appear in the test message.
Should you desire to make changes to the message you can do so by clicking on the "return to editing' button.
2. Choose the message timing in order to determine when the message will be sent. There are three options:
- ●"Immediate" – the message will be sent immediately at the end of the process.
- ●"Scheduled" – you must enter an exact date and time for sending (for example 01/03/2015 at 08:45).
- ●"By User Field" – you can determine a sending time before/after the user date field you set (for example two days before date of birthday)

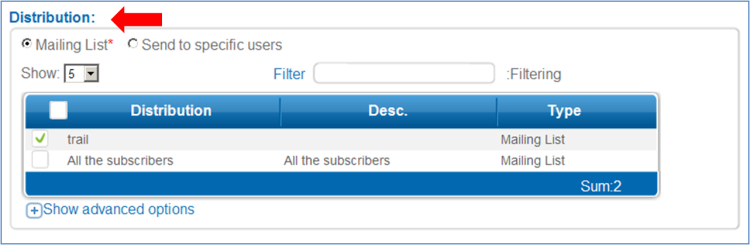
3. Choose who the message will be sent to: to one or more Mailing List or to a specific users.
 4. Can be added to the message: change of language, share on Facebook, send to friend and rate according to content.
5. Click on the "next" button.
4. Can be added to the message: change of language, share on Facebook, send to friend and rate according to content.
5. Click on the "next" button.
Sending Message
Attention – if you chose to send to a mailing group, a list of all the members in the mailing group will appear. There is an option to erase individual members that you do not wish to receive the message.
1. Click on the "send" button
2. A table containing message details of messages that have not completed sending will appear. When sending is complete the message will move to the sent messages list.
|